Codespaces provide a one stop shop development environment
Still trying to SSH into your Linux host and mount the file system in Visual Studio Code? There is a better way…

What are Visual Studio Codespaces?
Visual Studio Codespaces have been available for a while now, and recently a GitHub flavored version was announced at the Build online conference. In this article I’ll explain what Codespaces are, and how you can customize them to create an instant development environment. For the purpose of this article, I’ll focus mainly on Visual Studio Codespaces, as that is available to everyone. However, expect to hear a lot more about this feature once it is integrated with, and delivered through, GitHub.
VSCode + Linux + GitHub + Shell = Codespaces
What are Visual Studio Codespaces? A codespace is a combination of a Linux container, a GitHub repo and Visual Studio Code. Essentially, if all you need for your development environment is a Linux shell, it contains all the ingredients for a one stop development shop. As it allows for customization of the image, you can automatically install all project specific dependencies and tools with the exact versions you require. This enables on-demand creation of a development environment that can build your project, for people that have access to your repo. On GitHub, that is everyone :-)
Creating a Visual Studio Codespace
For Visual Studio Codespaces, before you can start, you’ll need to create a Codespace plan here. This requires an Azure subscription, I use my Visual Studio subscriber subscription. For GitHub Codespaces there is no such pre-requisite in the current early beta, though that may very well change later when it is made more widely available.
All you need is a browser
You can create a Codespace manually from a browser (Chrome or Edge), install tools, and come back later when you need it again. It will have a default shutdown policy, so you don’t have to worry about over consuming resources too much.

Visual Studio Code
This will lead you into the web UI of Visual Studio code at online.visualstudio.com. If you have the Visual Studio Codespaces (ms-vsonline.vsonline) extension installed, you can also create and connect to Codespaces from the Visual Studio Code client application:
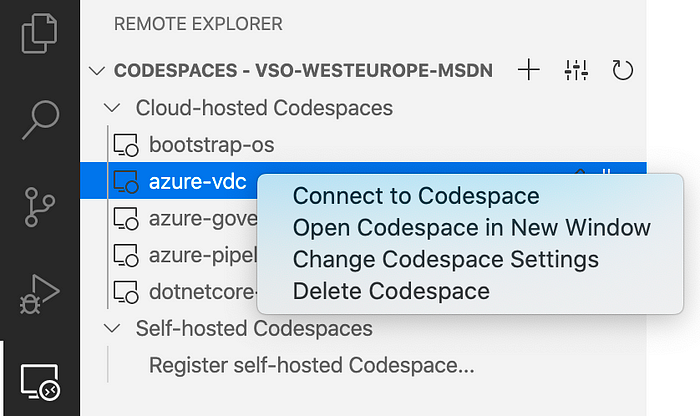
This provides a client experience as there is no noticeable lag when typing.
Customization
If you really want to take advantage of the power of Codespaces, you should consider using the provisioning configuration options (GitHub link) provided. This enables you and others to create a fully prepped development environment on demand.
There are two approaches: you can define a custom container (Dockerfile), or you customize by running a script on the default image when it is created. I chose the latter option. Below file goes into the .devcontainer/devcontainer.json location of your repo:
This file defines Visual Studio Code extensions relevant for the repo. The ‘settings’ node can contain any Visual Studio Code setting. In this case it sets the default terminal to PowerShell (Core/7).
Most importantly, it defines a command to run after the Codespace is created. This is the extensibility point that allows you to fully prep a Codespace.
Post-create command
The command execute a script post create of the container. The below script is used in my azure-vdc repo, other repo’s could have similar steps.
One thing I found is that you can’t completely rely on a consistent workspace directory location. I have seen these all being used:
/home/vsonline/workspace
/home/codespace/workspace
/home/codespace/workspace/<repo name>
Specifying a different branch than main/master when creating the Codespace has impact here as well. So instead of making assumptions, I determine the repo location by looking for README.md (which should be in the root of the repo):
$repoDirectory = (Split-Path (get-childitem README.md -Path ~ -Recurse).FullName -Parent)Other than that, I install some tools needed to build/run the solution, perform some initialization and customize PowerShell using my bootstrap-os repo.
Once you’re done customizing, you can make a direct link to create a Codespace with a given repo e.g.:
https://online.visualstudio.com/environments/new?name=azure-vdc&repo=geekzter/azure-vdcCodespace badge
You can even add a button by adding this to the markdown:
[](https://online.visualstudio.com/environments/new?name=azure-vdc&repo=geekzter/azure-vdc)
GitHub Codespaces
A button is nice, but the GitHub Codespaces flavored dialog is even better as it is directly integrated into the GitHub UI. This provides a seamless experience:
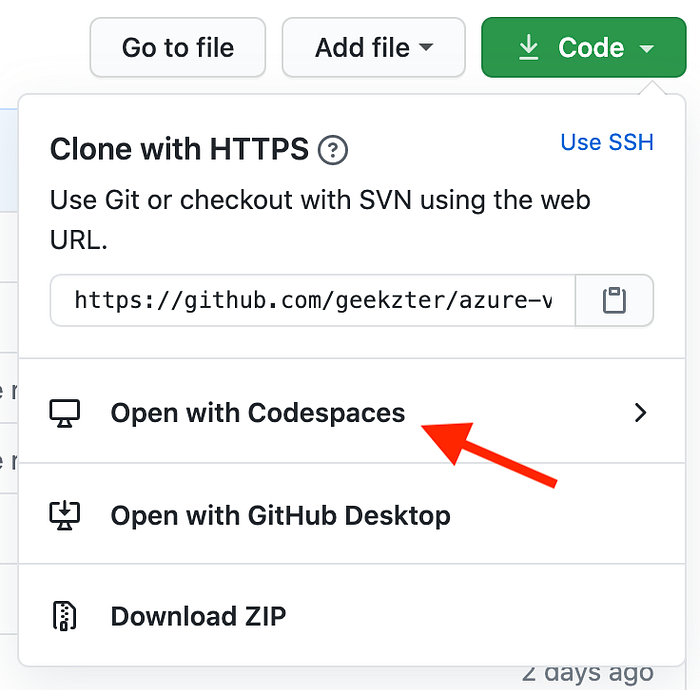
Note GitHub Codespaces is currently in beta, and you are waitlisted to get access. Once you are lucky like me, this is what you’ll get:

Except for the UI and navigation (you can conveniently navigate back and forth from GitHub to the Codespace, so you essentially never leave GitHub), this shares infrastructure with Visual Studio Codespaces:

I hope you found this useful and will consider using Visual Studio Codespaces or GitHub Codespaces, once that becomes available for everyone.
Examples are taken from my azure-vdc repo, a repo that uses Terraform, PowerShell & Azure CLI to create an Azure VDC.